

The basis for your web push marketing is as good as laid:
- You have received your individual account access.
- You have integrated the Signalize code (or etracker code) on your website as described here.
- You have (optionally) uploaded the Service Worker file into the root directory of your website.
- You have added our template from Settings → Privacy notice or your own Opt-Out button to your privacy notice.
- Optional: You have created an individual certificate for Safari MacOS users via the Apple Developer Portal and uploaded it directly to your Signalize account. More
It will now only take you a few minutes to send your first notification.
Configure and activate Opt-In
Log in via signalize.com and go to settings → Opt-In at the top of the menu bar..
Here we go.
STEP 1: ACTIVATE OPT-IN
First of all, please check the box for Opt-In. Don’t worry, the Opt-In will only be played after clicking Save at the end of the activation process, so you can take your time to make the settings described below.
STEP 2: SElECT DOMAIN WÄHLEN
You can send notifications either through a subdomain of your choice or through your own domain. The latter has the great advantage that the opt-in process is a one-step process, in that the browser’s consent dialog appears directly. For this option you need a website with https and a Service Worker file uploaded to the ROOT directory of your website. You can find the Service Worker file in your Signalize account under Settings → Installation → Upload Service Worker file (optional).
With the subdomain variant you only need to enter your domain, which will be automatically added by signalize.com.
Tip:
To collect recipients immediately, start with the subdomain variant and switch to your own domain if your administrators have published the necessary Service Worker file in the root directory of your website. This way you don’t lose any time and can get started faster. The subdomain subscribers will of course continue to receive your notifications even after the switchover.
STEP 3: SET DISPLAY OPTIONS
Set when and where exactly you want to invite people to push reception. In general, Web Push notifications are played on all device types (desktop, smartphone, tablet). You can restrict this, but we usually don’t recommend it because it reduces the number of possible subscribers. It is important to consider on which pages of your website the dialog should be displayed.
Tip:
We recommend not to use the opt-in on more sensitive entry pages where any distraction should be avoided (such as shopping cart and checkout). This also applies to special website areas that are not primarily aimed at recipients of notifications (such as dealer areas).
STEP 4: CUSTOMIZE DIALOGS
For the subdomain option, then adjust the opt-in dialog and the pop-up with your individual text and, if necessary, an image. It is important to make the notification service attractive to your users and to inform them sufficiently about the associated data processing.
If you have your own domain option, you cannot customize the native browser dialog. However, you have the option of displaying a banner or a box at the same time as you give your browser permission. This allows you to emphasize the notification service and explain its advantages and optionally link to the corresponding privacy notice.
Example with dialogue box below the browser dialogue:
![]()
Example with darkened website:
![]()
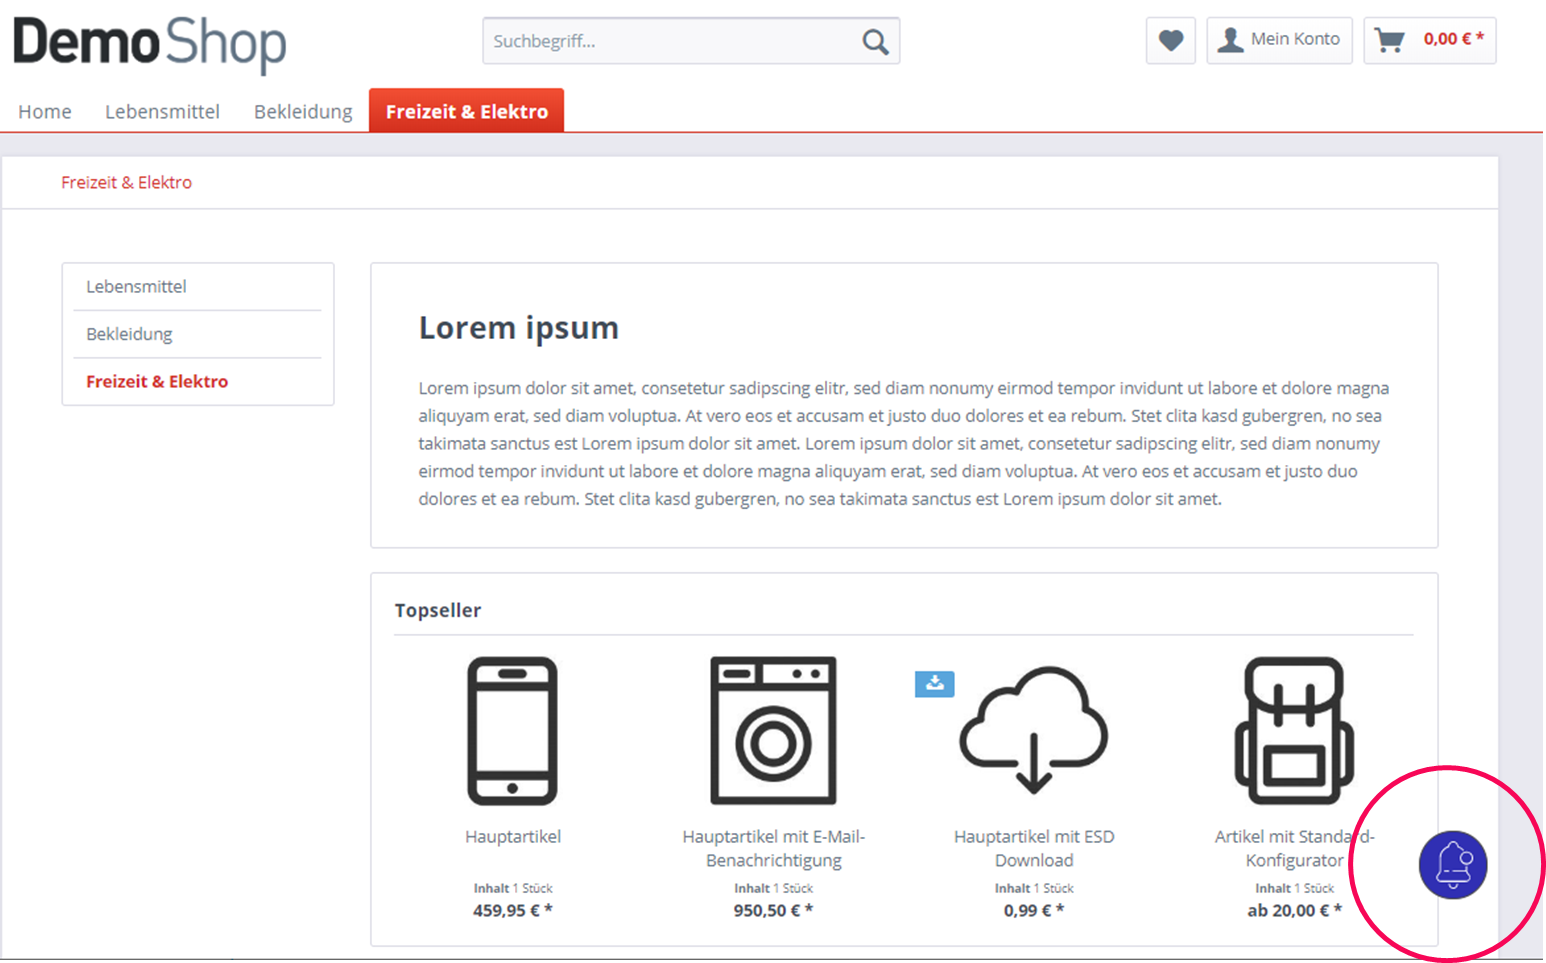
Visitors can only be invited to the notification service if they actively trigger it themselves. For this purpose an action button “floating” above the website can be displayed.
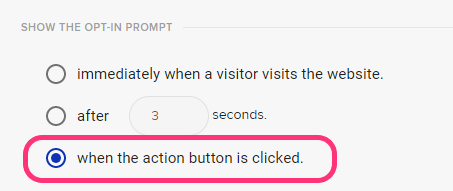
If this setting is selected, only the image you have individually configured will initially appear at the position you have specified on the website.
Alternatively, you can also trigger the browser’s consent dialog via your own elements on your page.
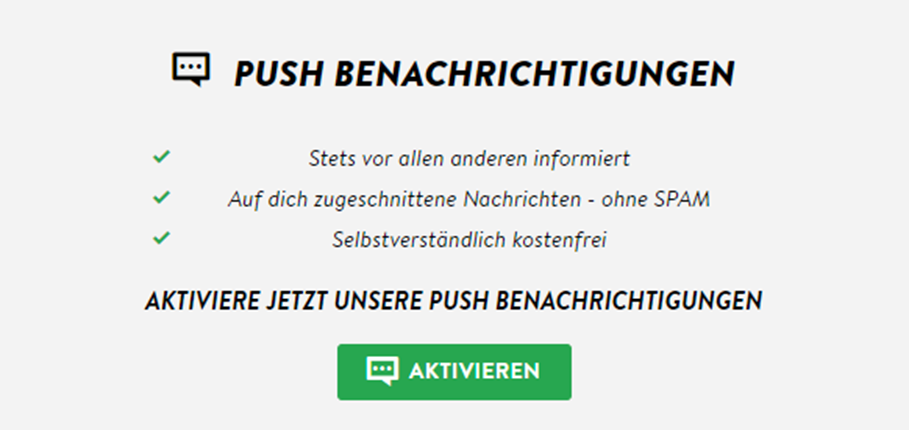
Here is an example of an invitation element that can be integrated into the page:
You can find more information about how to trigger the consent dialog yourself here.
Tip:
We recommend setting up welcome notifications using Welcome Automation. This way you can welcome new subscribers to the notification service and confirm their opt-in. The browser dialog simply closes without giving any feedback or even saying “Thank you for signing up”. This feature requires our Premium Package including Marketing Automation.
Congratulations! Your Signalize is now ready for use.